We’ve got a great basketful of updates for you this time that includes several features that have been asked about for a while. Thanks for your patience to everyone while we’ve worked on them!
Appointment Activity Logging
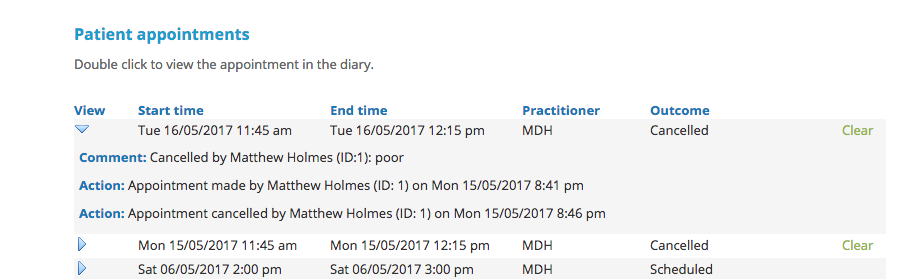
The first update is the logging of appointment related activity. The system now records who makes an appointment, plus who cancels, edits, changes the time and date, marks as arrived/DNA and validates online booking appointments, plus noting the time and date of the change. This will enable teams to track individual actions more clearly. Note that to do this accurately each team member should have their own login that they should use.
To see the activity for each appointment, navigate to the Patient Details area and scroll down to the list of appointments. Click the arrow on the appointment row to see the details of each appointment.
Cancellation Prompts
Another much requested feature is the ability to log a reason why an appointment is cancelled. Now instead of the alert popup that previously asked whether you wanted to schedule a follow up, there is a modal lightbox that offers the chance to record a reason for the cancellation.

If you wish to record a reason, enter it in the text area and click on of the Save options. Clicking Save will record the reason without scheduling a follow up. Clicking Save & Add will record the reason and schedule a follow up. If you don’t with to record a reason but do want a follow up, click Save & Add.
Any reason that is logged for an appointment can be found in the appointment logging section described above.
Something to note. Previously the system only prompted you to schedule followups if there was no further appointments booked. This has been changed to always ask, both to allow us to record reasons, plus to help you track people who are cancelling repeatedly.
Patient Tags
Another feature that has been introduced is tagging of patients. This allows you to allocate certain tags to people within the system. This extends the functions of categories in many ways and runs alongside that.
Ways you could use this feature include:
- If two practices use the same iconpractice instance you could tag patients by clinic.
- You could tag patients who are Medicare or DVA patients.
- You could tag patients by diagnosis if you were doing clinic research or audits.
Once you have tags in place you can search by Tag from the Search screen. You can also export patient data according to tag from the Settings->Export page.
To add a tag to a patient go to their Patient Details screen and enter start typing a tag into the text area.
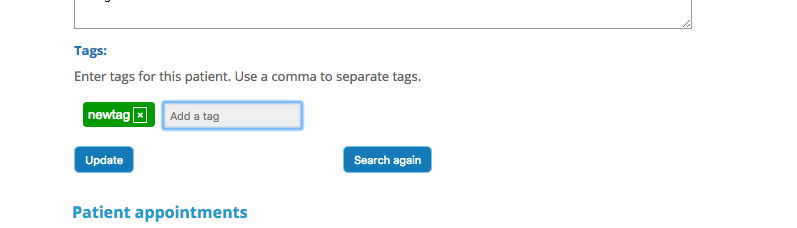
If a tag exists that matches what you are typing it will appear below the text area. Click to add it to the patient. If it doesn’t exist, when you press enter it will be added to the system and the patient.
Tags can be managed globally via Settings->Tags. It’s worth giving some thought to the tags you are going to use and the format to ensure consistency.
Exporting Changes
Lastly in addition to the ability to export by tag, patient exports now list the payment category of those patients that are exported, just in case you need this data for sorting patients.